Iphone Tips and Tricks | Iphone tips | Iphone Tips and Tricks 2022/2021

Usually, you don’t need to mess around with a Mac’s DNS (Domain Name System) cache. For the most part, it works as expected in the background, routing you to the right website as per the web address. Overburden of such data may lead to a corrupted DNS cache on the Mac, resulting in loading problems and the infamous 404 error. You can quickly troubleshoot the issue by clearing the DNS cache in macOS. Here’s how.
There can be multiple factors affecting the DNS cache on macOS. It can be due to network attacks, viruses, or IP address mapping corruption for well-known websites.
For instance, when you type “www.twitter.com” in the address bar, your browser may redirect you to another malicious website that the attacker added to your Mac’s DNS (Domain Name System) records. Instead of the Twitter homepage, you will continue to get 404 errors.
How to Clear DNS Cache in macOS
Deleting the DNS cache on your Mac will clear all saved DNS lookup information. Here’s how you can clear the DNS cache in macOS:
Step 1: Press Command + Space and open the Spotlight search menu.
Step 2: Type “Terminal” and open the app. You can also open Terminal on the Mac through Launchpad.
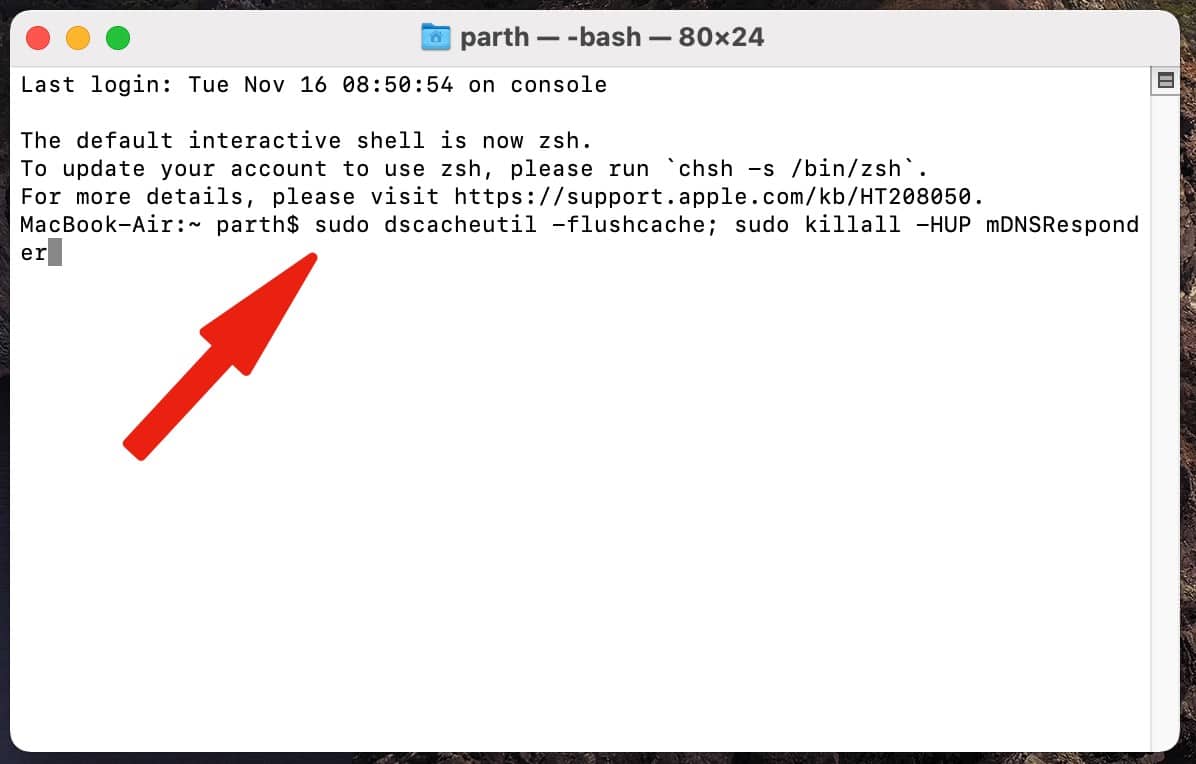
Step 3: Once you open Terminal, type the code below.
“sudo dscacheutil -flushcache; sudo killall -HUP mDNSResponder”
Step 4: Press Enter, and the Mac will ask you to confirm your identity. Enter your password and press Enter again to clear the DNS cache.

Once you clear the DNS cache on your Mac, problematic websites on Safari should behave normally again.
This trick works with macOS Big Sur, macOS Monterey, and newer versions. If you are running an older version of macOS, you need to run the following command in Terminal.
- For macOS El Captain or newer – “sudo killall -HUP mDNSResponder”
- macOS Yosemite – “sudo discoveryutil udnsflushcaches”
- For macOS Lion, Mountain Lion, and Mavericks – “sudo killall -HUP mDNSResponder”
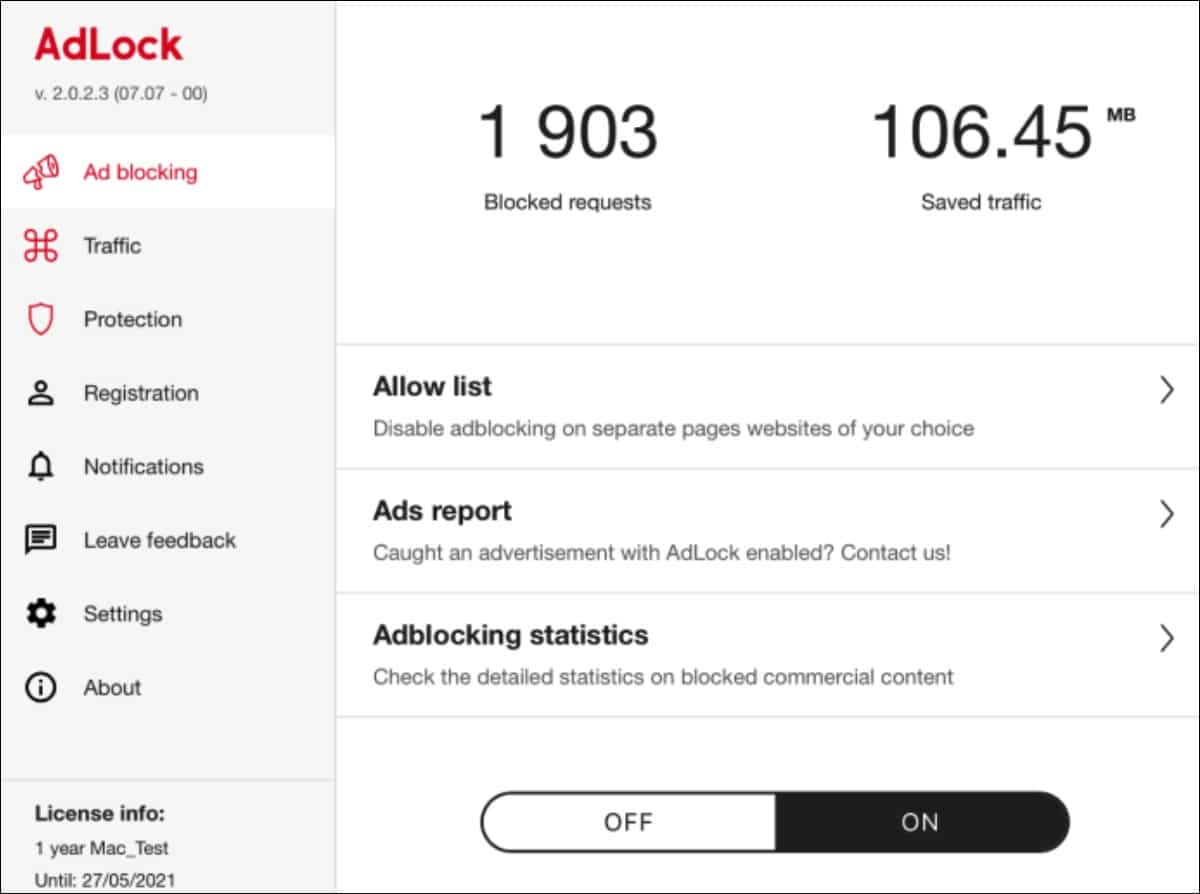
Apple executives call the macOS ecosystem a security nightmare because of Mac’s open nature to download unknown apps from the web. If you are not careful, you might end up installing bogus or duplicate applications containing malware and viruses. Here is where third-party tools such as AdLock come in.

Optimized for the M1 Macs, AdLock offers safe browsing and anti-tracking tools to help protect your Mac from malware and harmful files. The native software comes with DNS filtering, HTTPS filtering, detailed statistics, and more. Go ahead, give it a try from the link below, and protect your Mac.
Download: AdLock – Ad Blocker on Mac


0 Comments